Open navigation

Creating a Group

Saving an Item Group in the Item Group Editor (IGE)

After a list of items has been compiled in the Item Group Editor (IGE), the list can be saved as a group for future use.

  1. From the TECH Toolbar, click on the Item Group Editor wizard.
    The Item Group Editor icon located in the TECH toolbar
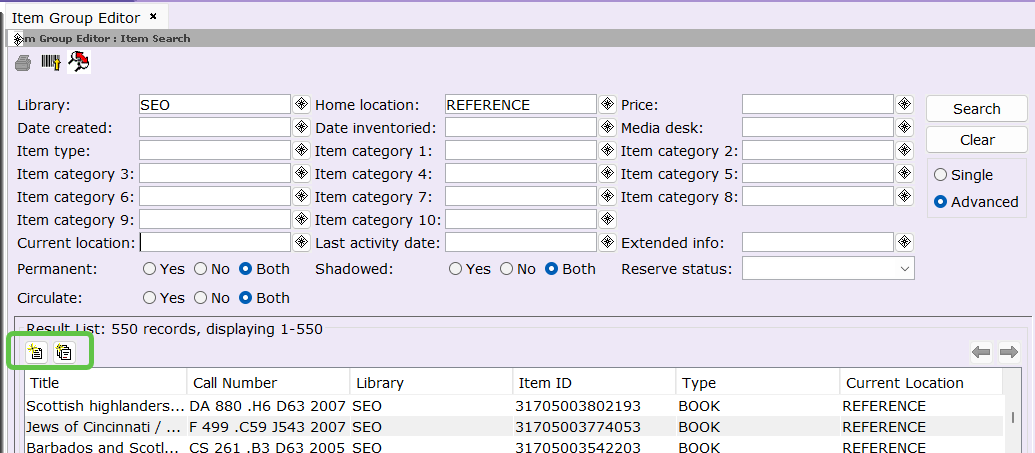
  2. Create your list of items using either the Single or Advanced search options.
    Interface showing the Single and Advanced search selection tabs
  3. Add items to the list:
    • Advanced Option: Use the Add Selected or Add All helpers to move items into the Item List area.
    • Single Option: Scanned items will be added to the Item List automatically.
  4. The Item List area populated with records
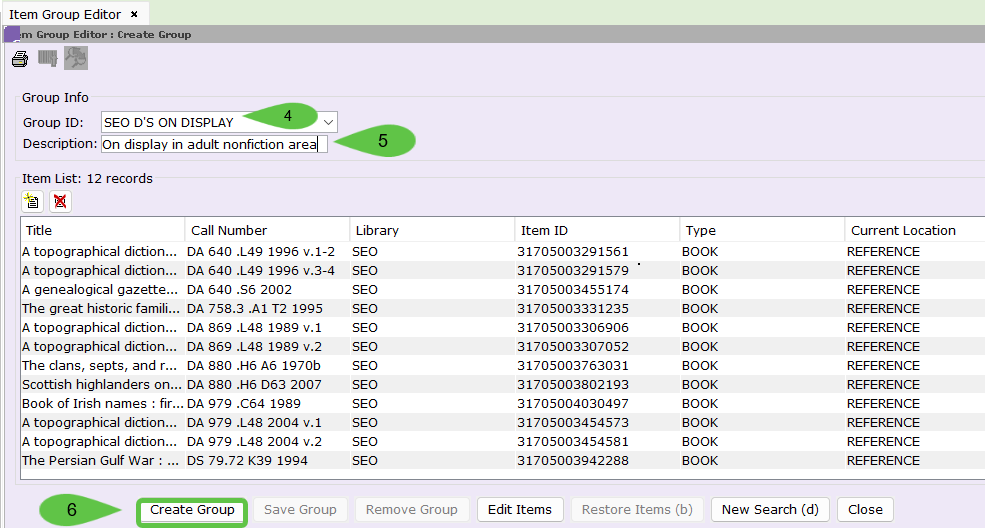
  5. Once the list is complete, click on Create Group.
    The Create Group button at the bottom of the wizard interface
  6. In the Group ID field, enter a name starting with your library's 3-letter code or your initials (Maximum 18 characters).
  7. (Optional) Enter a Description of the group (Maximum 70 characters).
  8. Click Create Group within the dialog box.
    The Save Group dialog box with Group ID and Description fields
  9. A confirmation window will appear stating the group was successfully created. Click OK.
    The confirmation pop-up window showing the Group Created message

Was this article helpful?

That’s Great!

Thank you for your feedback

Sorry! We couldn't be helpful

Thank you for your feedback

Let us know how can we improve this article!

Select at least one of the reasons
CAPTCHA verification is required.

Feedback sent

We appreciate your effort and will try to fix the article