Email subscriptions are the best way to automate reports that run for a relative timeframe (e.g., Previous Day, Week, or Month) or reports with static parameters.
1. Setting Up a New Email Subscription
- Run the report you wish to automate.
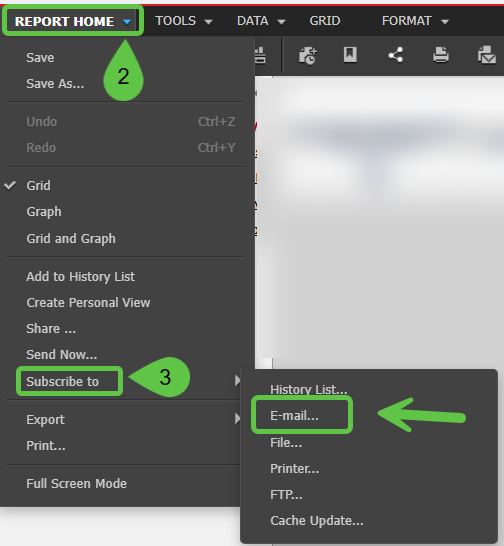
- Once the results load, click the down arrow next to Report Home.
- Select Subscribe to and then click E-mail.
- Schedule: Use the dropdown menu to choose your frequency (e.g., Daily, First of the Month).

- Recipients: Click To. Fill in the Address Name and Physical Address (email). Click Add To Recipients then OK.

- Delivery Settings: In the Send field, we recommend selecting Data in Email. Choose your preferred Delivery Format (e.g., Excel or PDF).
- Page-By Feature: If the report has multiple branches or locations, ensure the Expand Page-by Fields box is checked to include all data.

- Subject Line: Update the Subject to something descriptive so you can identify the report in your inbox.
- Click OK to save the subscription.
2. Managing Existing Subscriptions
To view, edit, or delete your automated reports, click the My Subscriptions icon on the main navigation bar.
- To change the schedule or recipients: Click the Edit icon (pencil) in the Action column.

- To change report filters or prompts: Click the Personalize icon (green question mark) in the Action column.
